
There are a few basic "ingredients" to a professional style gift basket. You will need:
The Basket/Vessel: Sometimes I used little cardboard boxes that looked like a cake, or a galvanized tin for a beer-themed basket. It does not actually have to be a basket, be creative!
One of my favorite blogs, Life on lake Shore Drive, made one for Valentine's Day using a milk glass vase!

The Filler: Most baskets have some depth to them, and for proper placement of the giftables you are going to add, you need to fill that "dead space" with something. When I worked for the shop, we made "pillows" of newspaper or sometimes packing peanuts wrapped in newspaper. You can also use a chunk of floral foam.


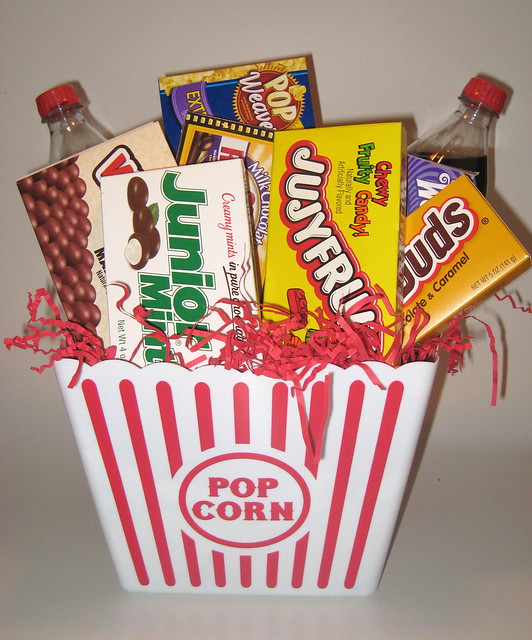
The Gifts: This is the fun part, choosing a theme or reason for the basket and finding the goodies! Try to match your vessel to the theme as well. I have made teacher gifts with coffee mugs and a variety of free coffee and tea samples, Easter baskets with sidewalk chalk and toys, baby shower baskets inside a handmade "day" diaper bag, Mother's Day baskets with homemade "spa" items and one popcorn bucket full of movie related goodies (ticket stub memory book,candy,movie tickets).
Note: Sometimes it helps to take your basket with you when picking out the gifts, that way you know what will fit properly.
 |
| Picture courtesy of my old employer, Main Street Gifts |
The Decorations: No basket is complete without a bow or flower! Pick something to match your theme. In this picture I have pretty ribbons added to a baby shower basket! You can use your gift tag as a part of this, make sure it is creative and fun.
 |
| Picture courtesy of my old employer, Main Street Gifts |
The Tools: You will need scissors, tape, wood kabob skewers (optional).
Now we start assembling the gift basket:
Step 1: After settling on a theme and using the materials list above, gather the contents and materials you'll need to create your own gift basket. Buy or make individual gifts that you plan to give (i.e. make scrubs, decorate jars, attach tags). Gather your filler and cover, as well as any other decorations. Use a clear, uncluttered table to lay out everything.
Step 2: If using an old basket (like I like to) make sure it is clean and not broken or cracked. Add your filler. I like to leave at least an inch of space before the brim. Add your cover.
Note: If you can see filler paper through the sides of the basket, you must first line the basket with something decorative such as tissue paper, shredded paper or whatever you are using for the cover.
Step 3: Add your gifts! Make sure they are lined up nicely, in a visually pleasing manner. Most people find even pairings (or sets of 3) of things to be the most pleasant. Items can be secured to each other, to the basket or even held up straight with a skewer that is taped to the back of an object and stuck into the crumpled filler paper (or into floral foam for larger baskets). Use other contents and decorative materials to disguise such supports if necessary. Add more cover if need be!
Step 4: Time to decorate! This part is all up to the individual basket maker. You are probably going to want to add a theme related gift tag, bow or ribbon. Use whatever you have that fits your theme and your needs. If using cellophane to enclose everything, you will probably use this step to hide the tape that you used to close up the wrapping.
The main secret to making gift baskets look professional is use anything and everything to get your gifts to sit properly in the basket! Other than that, it really is pretty easy! With a little practice you can make beautiful Easter baskets or baby shower gifts with ease!

This work by Little Mom on the Prairie is licensed under a Creative Commons Attribution-NonCommercial-NoDerivs 3.0 Unported License.
No comments:
Post a Comment